
Shopify Full Guide
Shopify is a platform where you can open a store and sell online or do dropshipping. If you are a developer, you can develop themes or apps for customers...

In this article, I’ve shared my perspective on Shopify from both a developer's and a user's point of view. I’ve discussed my experiences and thoughts about different themes. If you’re new to Shopify, I’ve included essential insights to help you work with themes and set up a store. While Shopify also allows you to develop apps, I haven’t explored that aspect. So, this article focuses solely on theme development.
Table of contents
- What is Shopify?
- What you need to open a Shopify store?
- Shopify first steps
- Store settings
- GitHub integration
- Shopify files and folders
- Shopify CLI
- Shopify VS code extensions
- Overall
What is Shopify?
Shopify is a platform where you can open an online store or run a dropshipping business. As a developer, you can create themes or apps for merchants. The theme is crucial because it represents your store's appearance and functionality. That's why it's important to choose a theme for your store carefully.
The popularity of Shopify
Shopify is one of the most popular e-commerce platforms, and in my opinion, it's the most popular due to the many great features it offers behind the scenes.
One of the standout features of Shopify is its interface. While design is subjective, I personally find Shopify’s interface to be intuitive and easy to navigate.
The second great feature is the documentation page. Have you checked it out? It's clean, detailed, and very well-organized. It's a great resource.
The third awesome thing is the development opportunities. While other e-commerce platforms like WooCommerce also allow for theme development, Shopify takes it a step further with tools like Hydrogen, a React-based framework. This allows you to create dynamic stores, which is incredibly powerful.
I’m not claiming that Shopify is the best or anything like that. I’m simply sharing my experience with it. Having worked with different e-commerce platforms, I can honestly say that I love Shopify. Of course, Shopify has its disadvantages, and I’ve written an article about that topic as well.
What you need to open a Shopify store?
To open a Shopify store you need to create a Shopify account. Right after that, you should choose a plan that your store fits more. When you just sign up you will get 3 trial days. After the trial, you will need to pay for the plan you picked.
There are no paid plans for development. To work with a theme as a developer, you should change the type of store to “Development”. For easy work, it will be great to have a partner account. Partner account allows you to see all stores you have access to on one page. It’s handy when you have a lot of stores and is just nice to have.
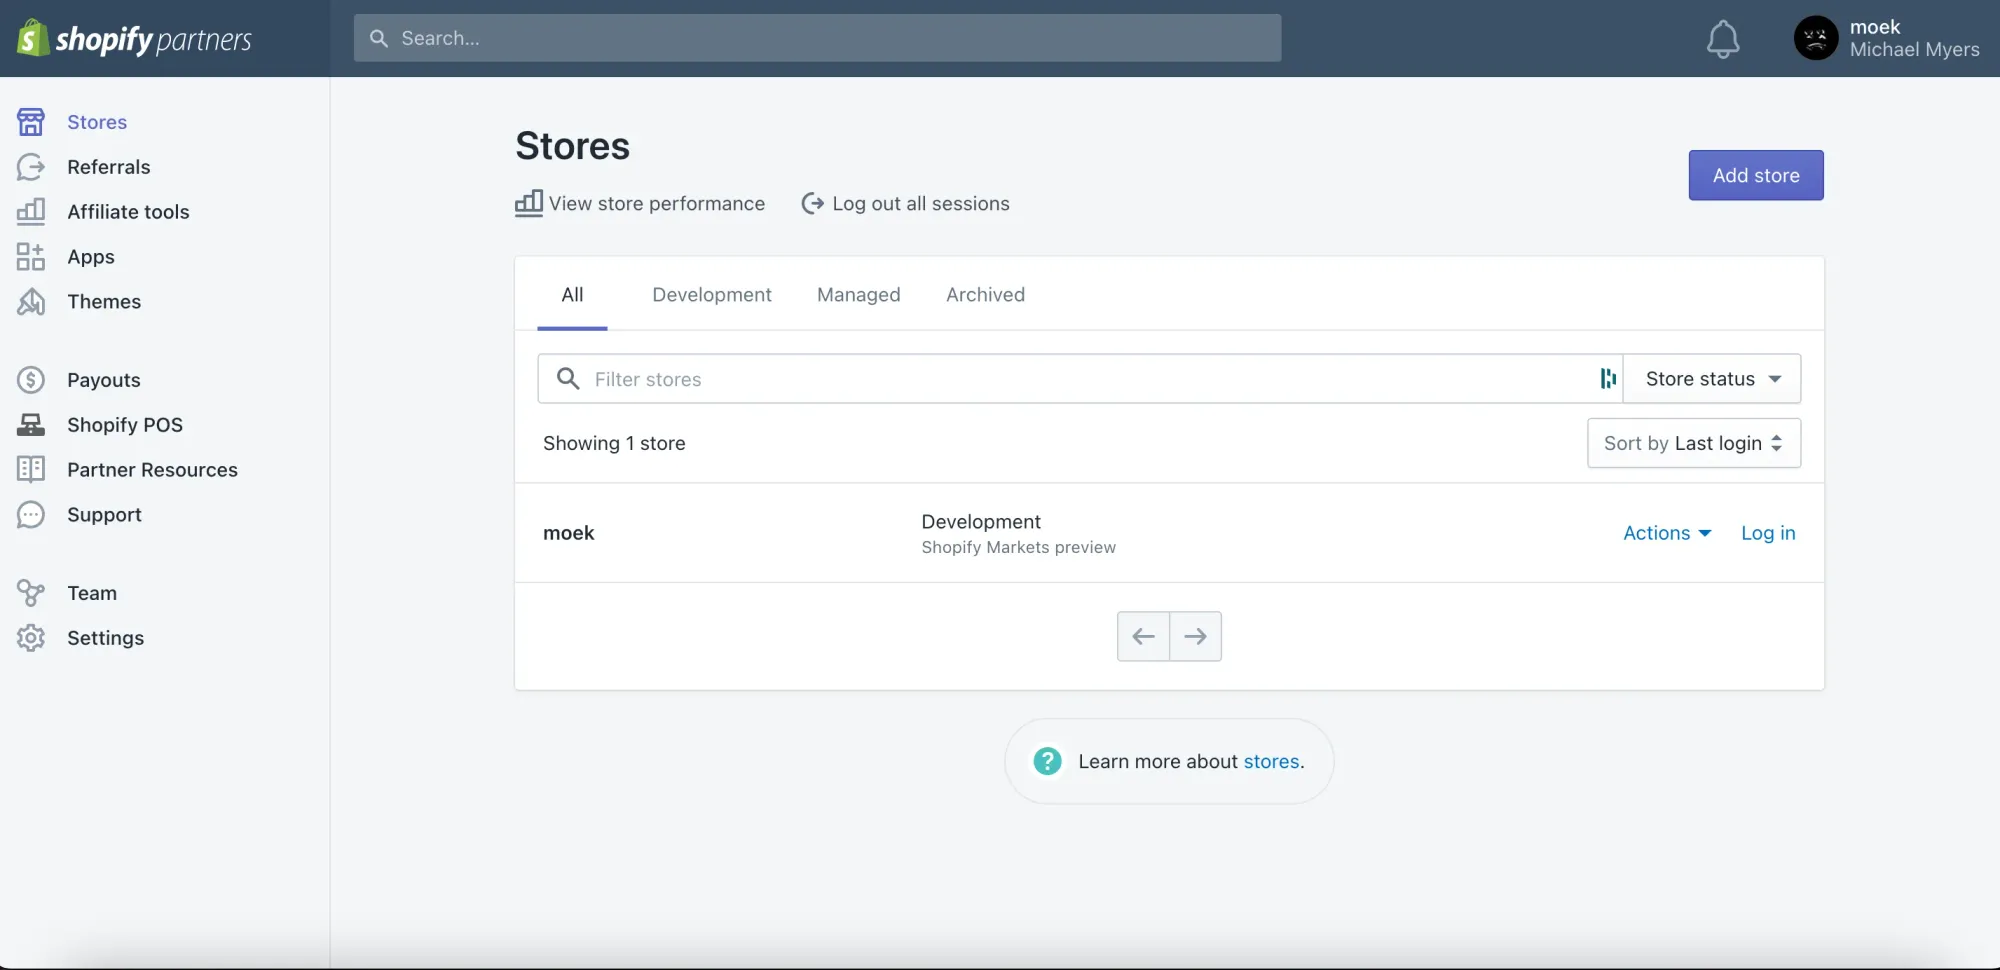
As you can see, I have only one store and the type is Development. When your store is in development mode you can activate some features that are in beta, as I did. I activated the Shopify Markets Preview feature and now on my store yellow banner appears everywhere.
Shopify first steps
Admin panel
First things first you need to create a Shopify account if you still don’t have one. The next step is to go to the admin panel of your store. To do it put slash and write admin. It looks like this: https://yourstoreurl.myshopify.com/admin
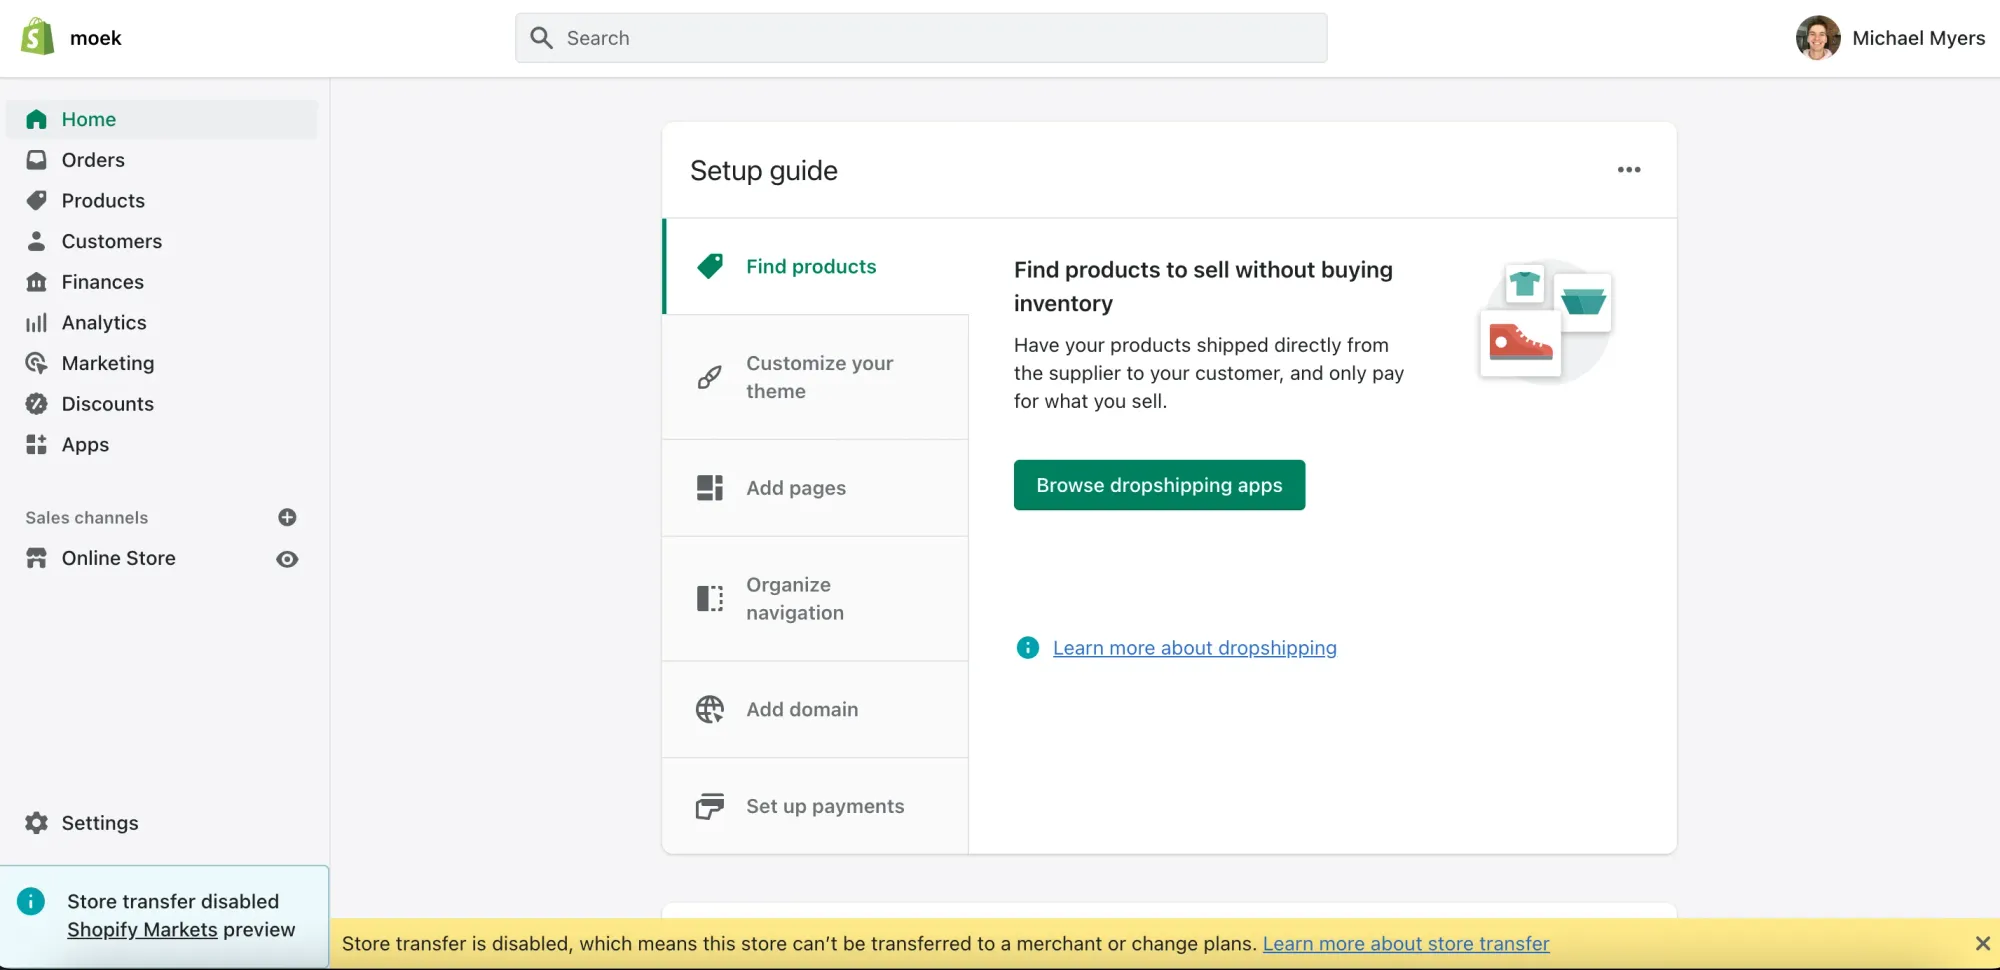
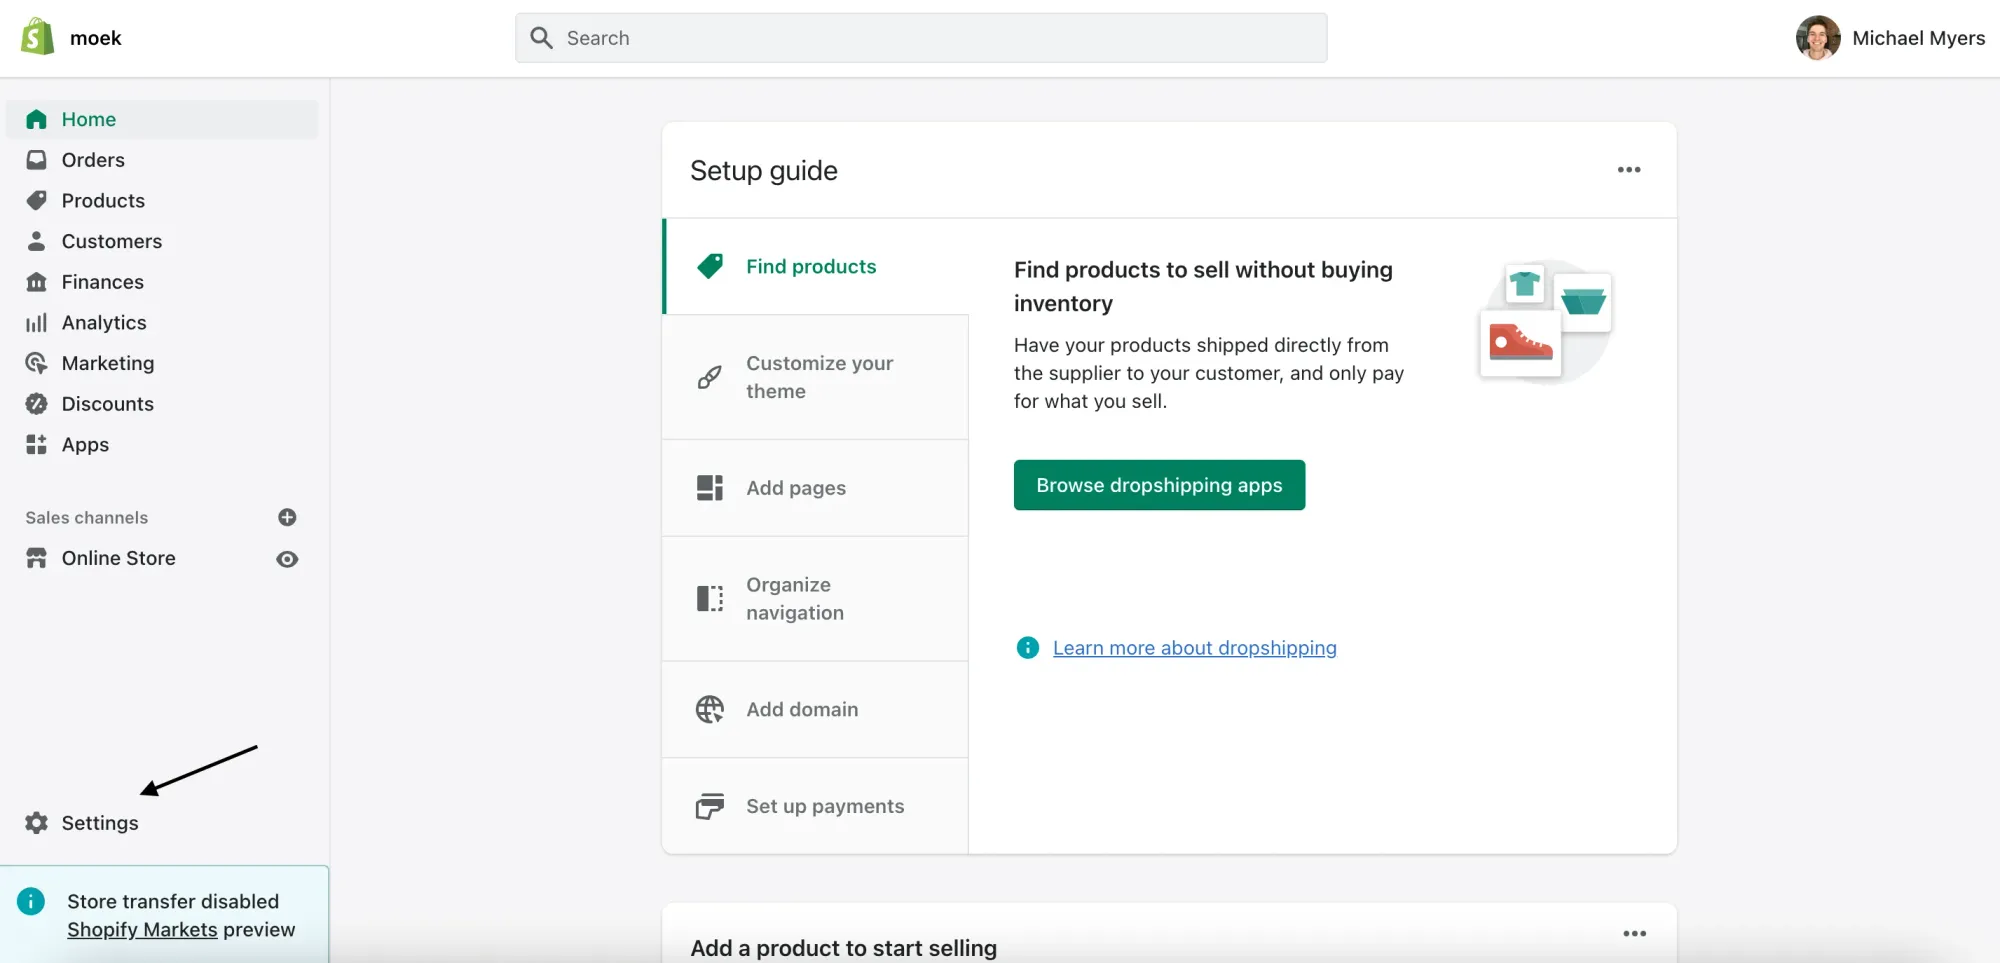
Setup guide
And the best practice is to read the setup guide from Shopify. You will learn basic information about how to open and set up a Shopify store. It will bring you from “how to create a product” to “payment settings”. It is located in the right top corner and the side of a profile.
How to choose a theme?
If you're considering buying a theme from third-party publishers, be cautious. In my experience, many developers sell themes with coding errors, missing features, typos in the admin panel, and other issues. One benefit of these themes is that they usually come with developer support after purchase, though the support period varies. Typically, it lasts about 60 days, but not all developers provide quality support.
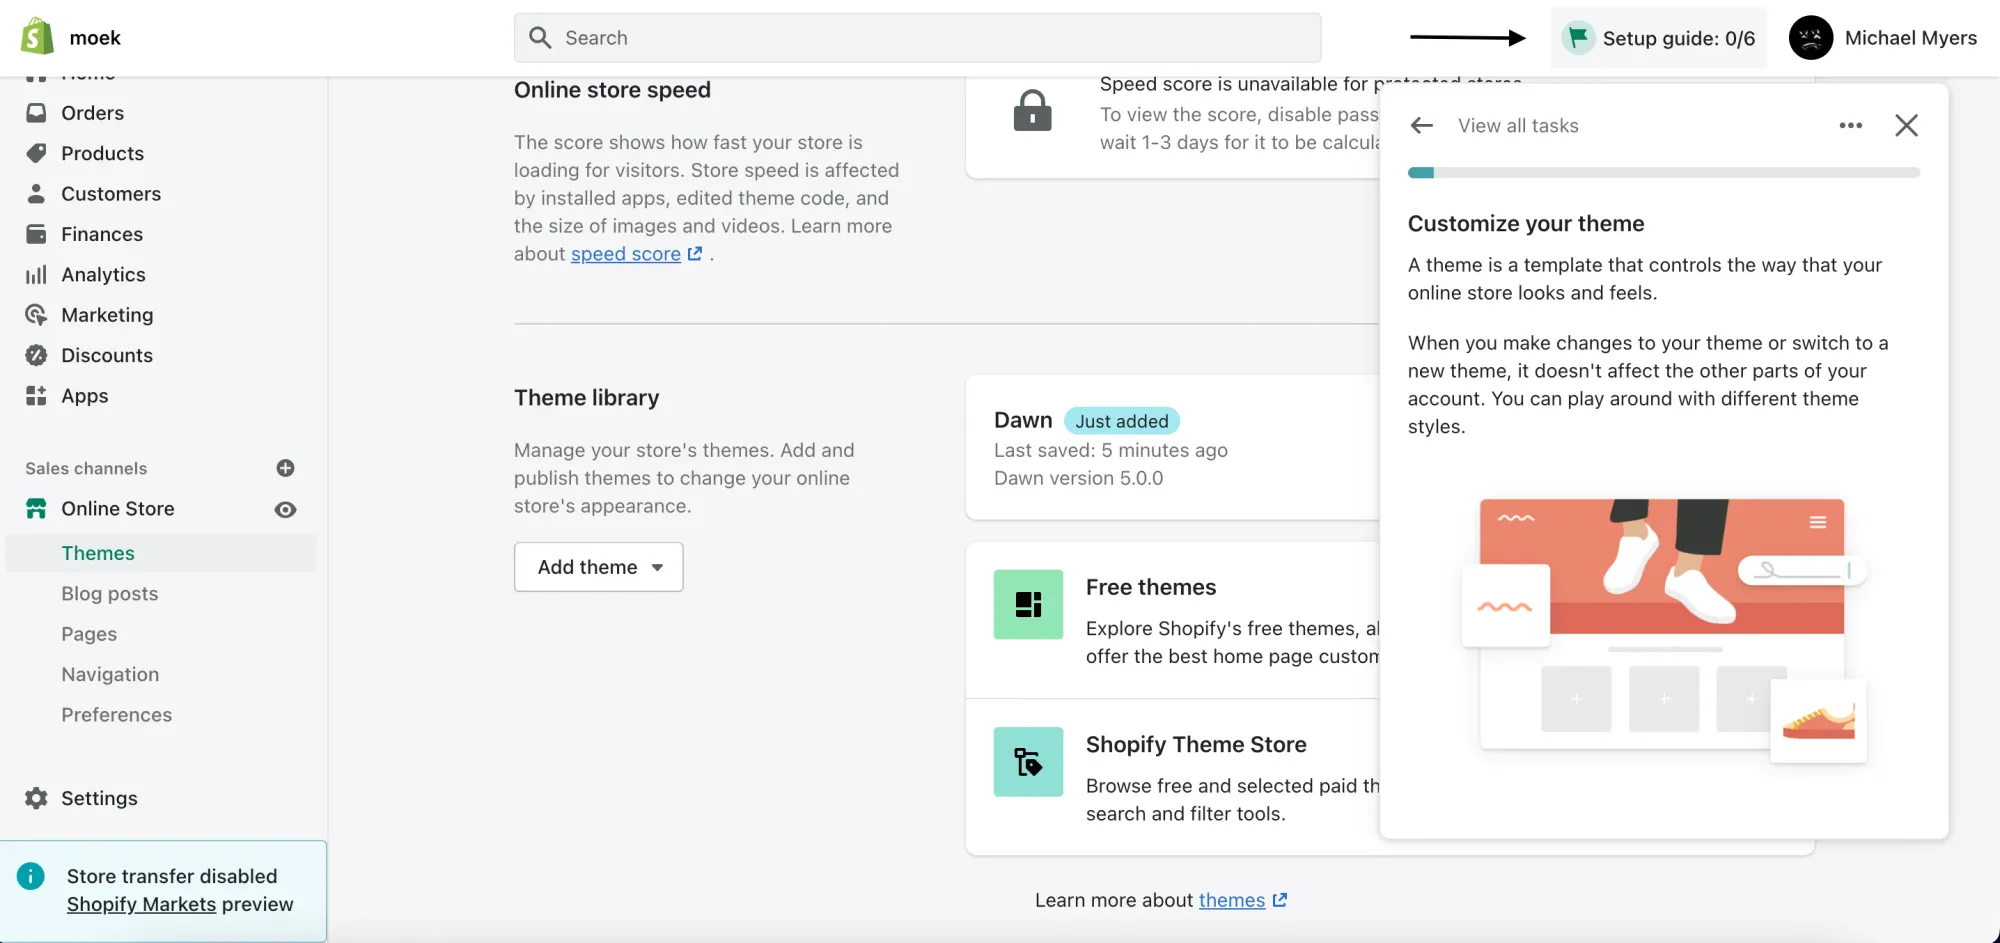
If you're a developer, I recommend using the Dawn theme. It's easy to customize to fit your or your client's needs. I've worked with various themes, and in my opinion, Dawn is the most practical for code customization.
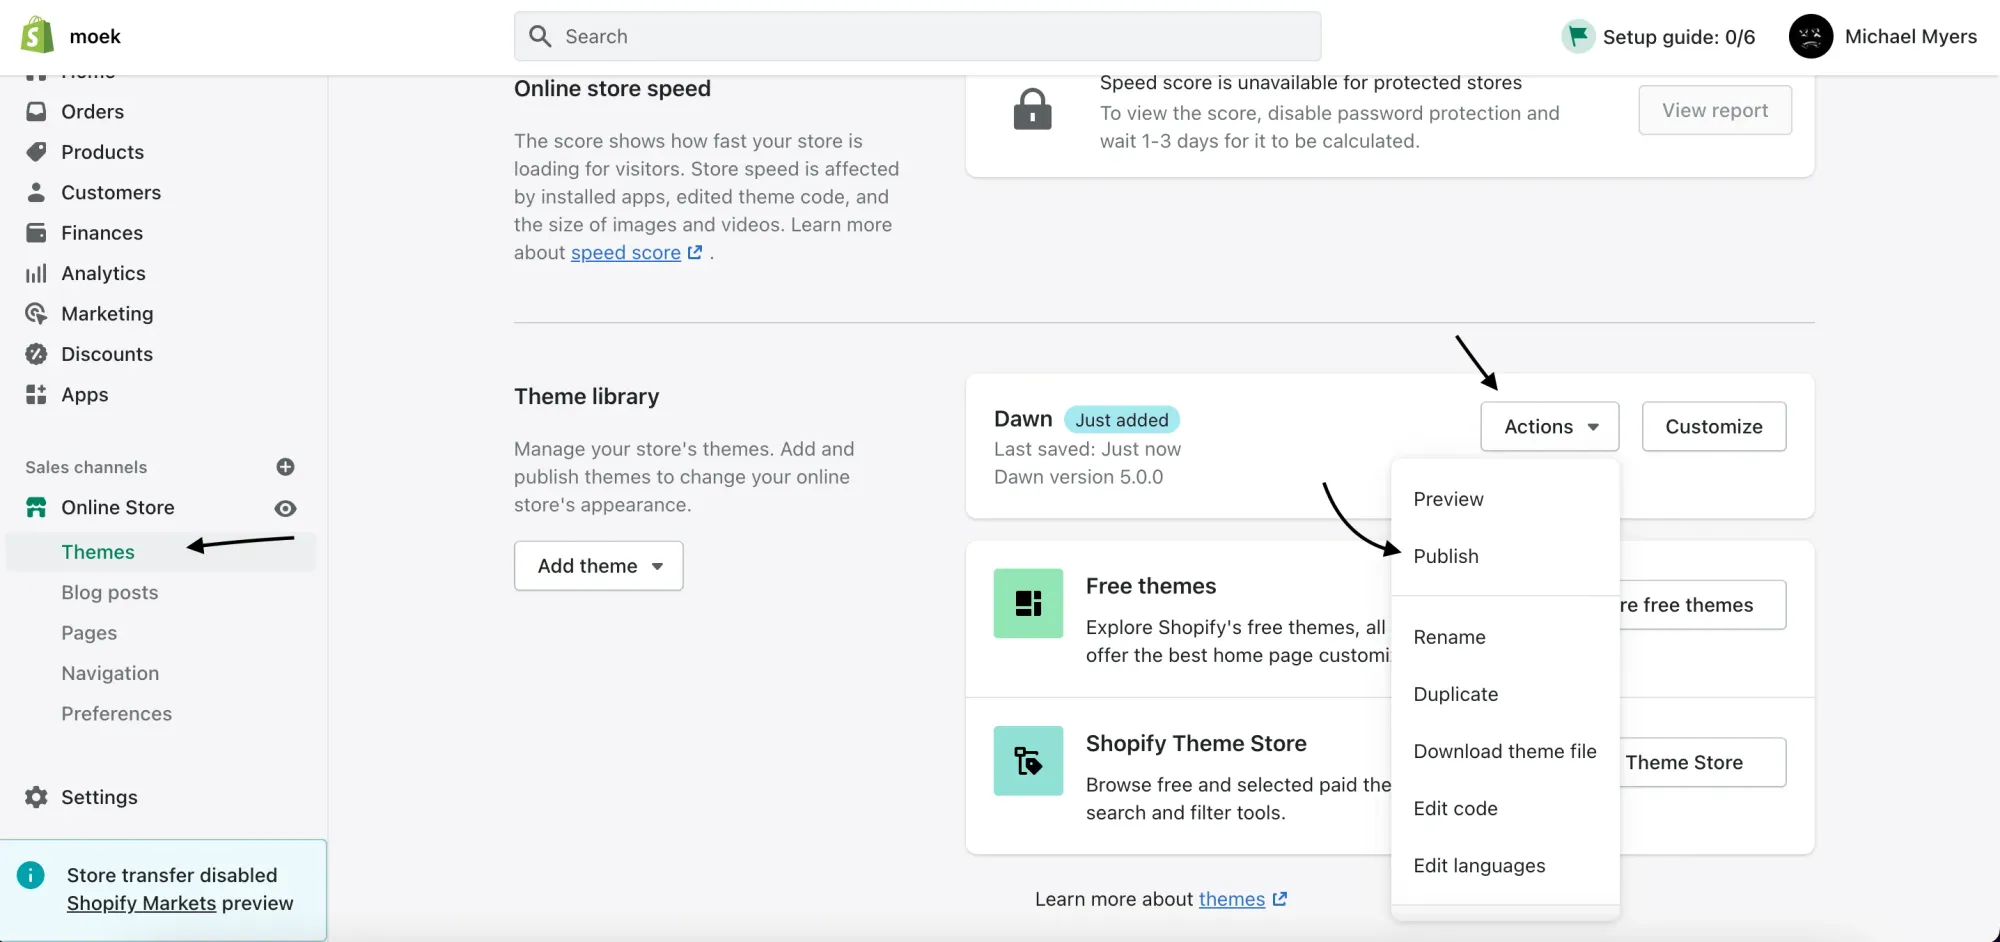
Once your theme is chosen, you can publish it as shown below:
Multiple languages in a Shopify store
Shopify supports multiple languages in its themes, but if you're using a third-party theme, there's no guarantee it will include multi-language support. From my experience working with various themes, most of them offer a multi language support.
To change the language of your theme, go to Actions -> Edit languages. This will take you to a page where you can select a language and customize the words or phrases for that language.
Store settings
Before you started selling your goods, you need to put some settings in your store. The settings are located at the left bottom corner.
When you are there, you will see a bunch of different settings. The first tab is a basic setting like company name, industry, address, contact information, store currency, etc. At this tab everything is okay. Let’s see something tricky.
Let’s go to the Checkout tab and see it in detail because this setting is about placing an order in your store. Why it’s so important? When you are buying a theme or using a free theme, this tab is not obvious and you can face an issue. And the issue is the account icon in the header. In most themes, this icon is connected with this setting. The first point in this setting asks you to choose one variant about how to use a personal profile on your store:
1. Don’t use accounts
Customers will only be able to check out as guests.
2. Accounts are optional
Customers can create accounts or checkout as guests.
3. Accounts are required
Customers must create an account when they check out.
When I first started learning the Shopify platform, this setting confused me, and it took me some time to figure it out. I recommend exploring and checking other settings carefully.
If you're a developer, the information below is specifically for you (but if you're just curious, you're welcome to read on!).
Right after you set up your store, time to connect your theme with a GitHub repository.
GitHub integration
How to connect a Shopify theme from a GitHub repository?
Now it’s time to connect a theme from GitHub. This is a cool feature that allows you to track changes in your theme. It means you have a history of your theme and can easily back up if something breaks. And the cool thing is every time when you make some changes in through customizer, it commits in GitHub automatically. All you need to do is choose Connect from GitHub when adding a new theme.
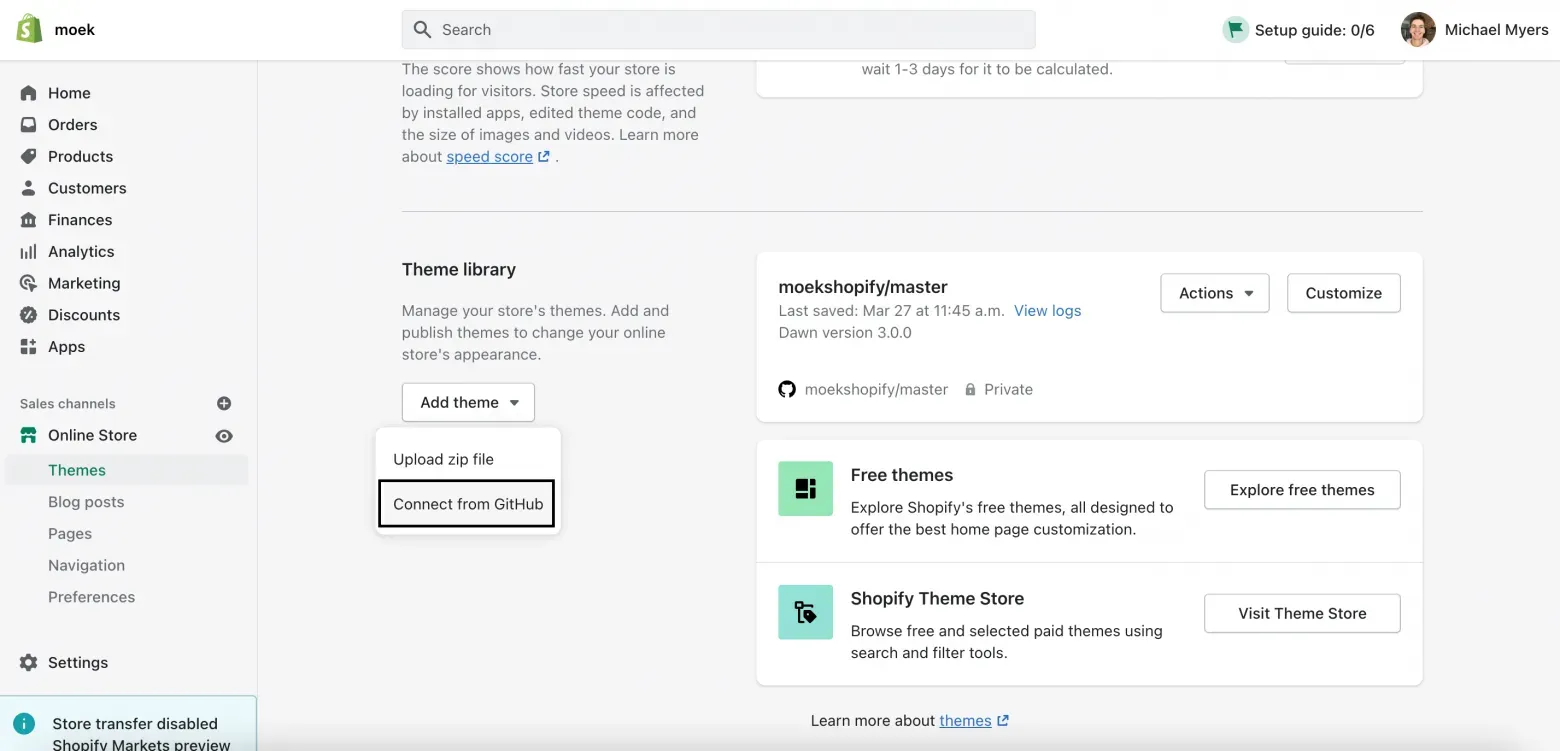
If you already connected your GitHub account to your Shopify partner account, then you need to pick a repository where your theme is stored.
Congratulations! You know how to connect a theme from GitHub now.
The next step is to learn how to work with theme code. To open a code editor choose the right theme and click Actions -> Edit code. You will see this page:
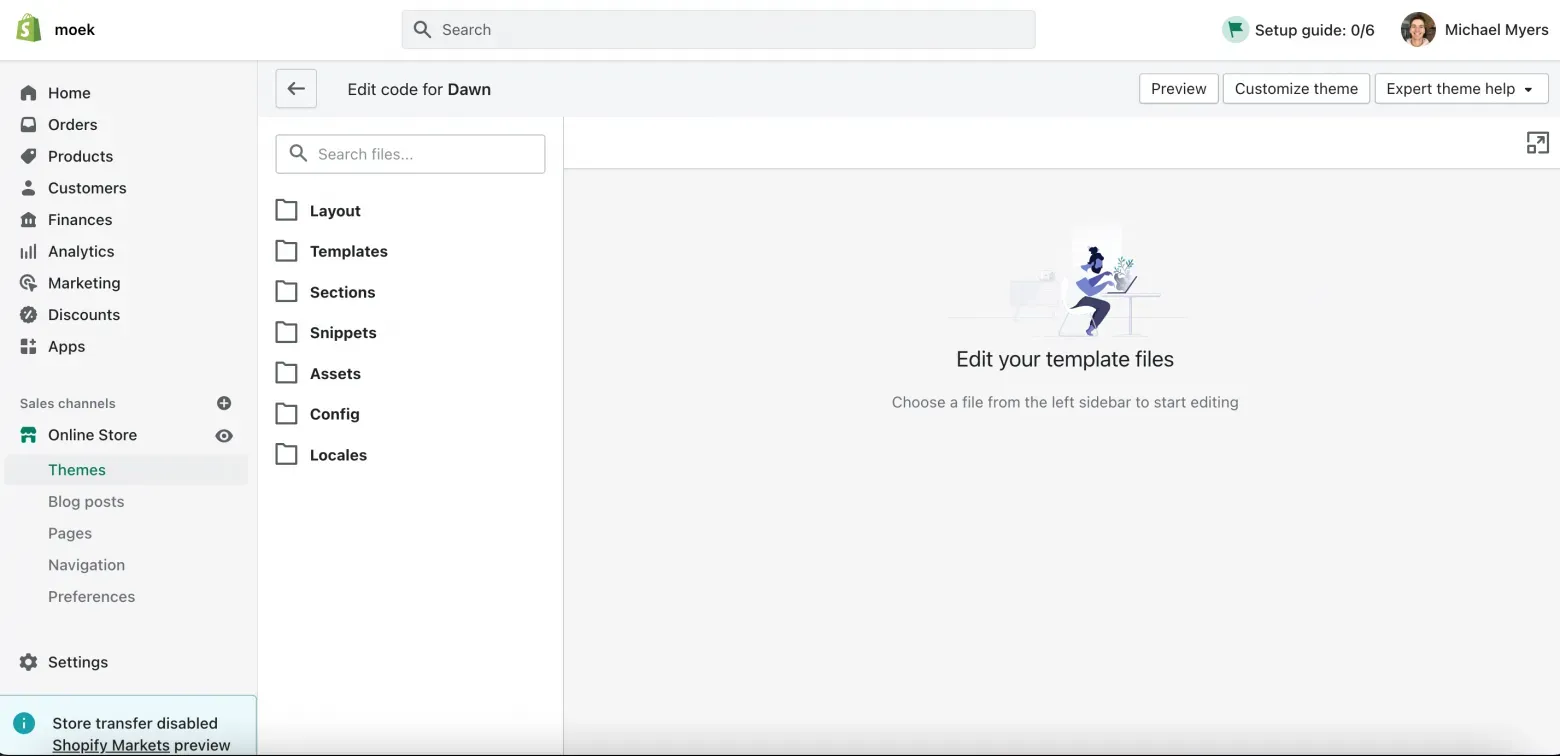
In the left side you can see folders. Each folder contains special type of files.
Shopify files and folders
Layout
Layout store a theme.liquid — the main theme file. This file needs to connect CSS, JavaScript, and more functionality to your website. Also this file stored footer and header of the store. Oh and this file can contain a file called password.liquid. In this file you can change the layout of the
Templates
It needs to create page templates like products, 404, cart, collection, blog, search, user profile. You can create different templates of one media content. For example, you can create different templates of product page and use them depends of situation (sale, event, etc.). To change product template go to a product page in admin panel and in the right sidebar in tab Theme template choose a template you have.
Sections
It needs to store sections. Sections — the main component in store creation, because they are includes the whole content of the website.
Snippets
Snippet — a file, that can be render in any place of the website. To render it you need to paste this line of code in the place where you want to show the content of your snippet:
{% render 'snippet-name' %}
Assets
Store all styles and scripts.
Config
The files in the folder creates automatically when you make changes in the customizer. I don’t think you need to change something. But sometimes you will need it, but it’s a kind of rare case.
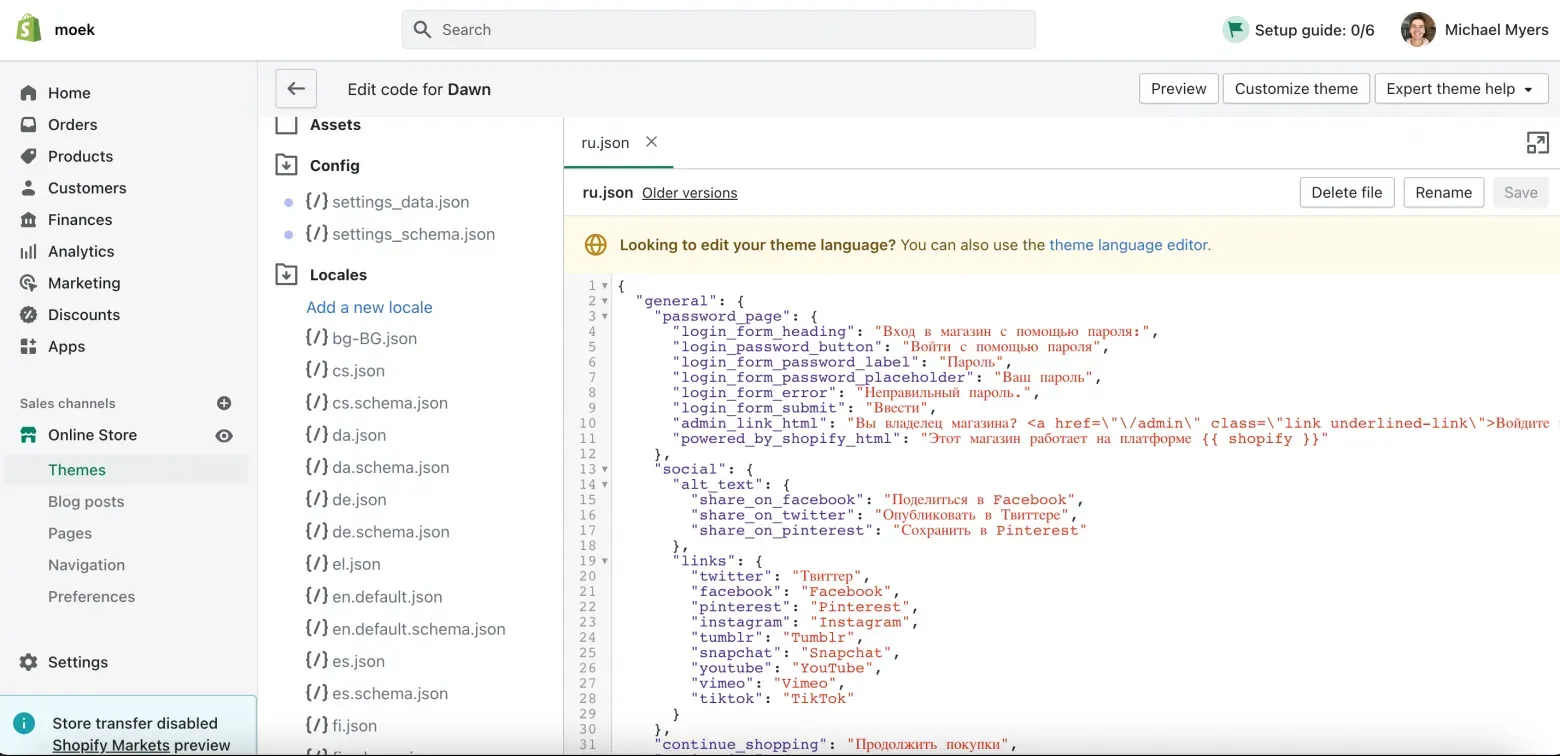
Locales
The folder contains translations. By default will set English. In Dawn theme there are a bunch of different translations. But check your theme, you may not have them. You can translate your theme in the specific file, and in the admin panel using Edit languages button.
As you know there are no emmet, code highlighter in the Shopify theme editor. So let’s see how to work with Shopify in the code editor like VS Code.
Maybe you have a reasonable question — how to edit Shopify themes using VS code or any code editor. And now I’ll tell you how.
Shopify CLI
What is Shopify CLI?
I use Shopify CLI every day and love it so much. The current Shopify CLI version is 3. There are some changes from 2 version. I’ll tell you in the next article about these changes (maybe).
How to install Shopify CLI?
Before you will install Shopify CLI, be sure you have:
Install on macOS (Homebrew)
brew tap shopify/shopify
brew install shopify-cli
Install on Windows (RubyGems.org)
gem install shopify-cli
Shopify CLI commands
Version
shopify version
If the installation successful, you will see a current Shopify CLI version on your PC, like that:

You can also use VS Code terminal, it’s doesn’t matter.
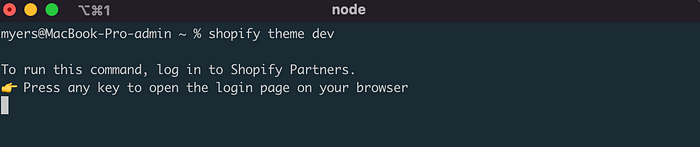
Authentication
Use shopify theme dev to connect to a Shopify store:
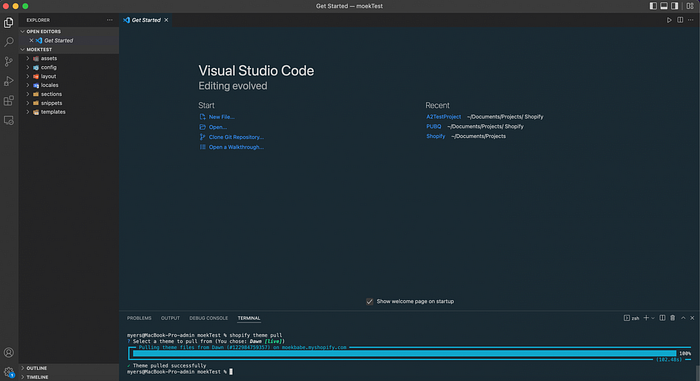
Theme pull
To pull files from store to a folder on PC use this command:
shopify theme pull -s https://store-url.myshopify.com
You will see a message like so:

Depends on the files size you need to wait some time. After success you will see the theme folders at the left sidebar:
To log out from the store, use this command:
shopify auth logout

Congratulations! You have learned how to pull theme files from Shopify. Now let’s check some useful commands that will help you to work with Shopify themes.
Theme dev
The first command I would like to mention here is shopify theme dev.
This command help you to "serve" the changes and show them in real time. You make changes and the page is live reload, it’s like a Browsersync. And the cool feature is — if you make a mistake you will see an error message in the terminal.

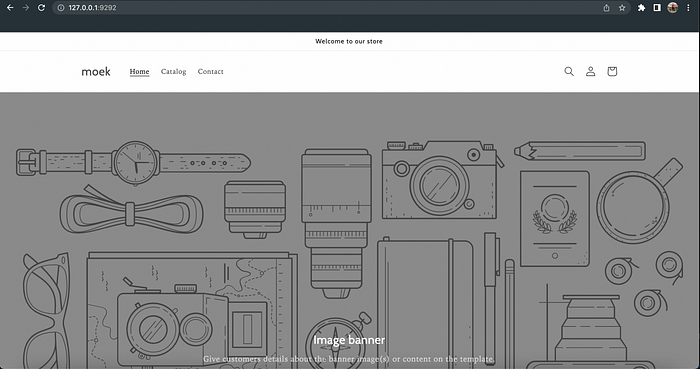
Now we can open our store using this URL in a browser:
Theme push
After you made some changes in your local theme, time to push the changes. To push files back to Shopify use this command:
shopify theme push
It will ask you where to push, be careful on this step:

Help
Run this command:
shopify commands
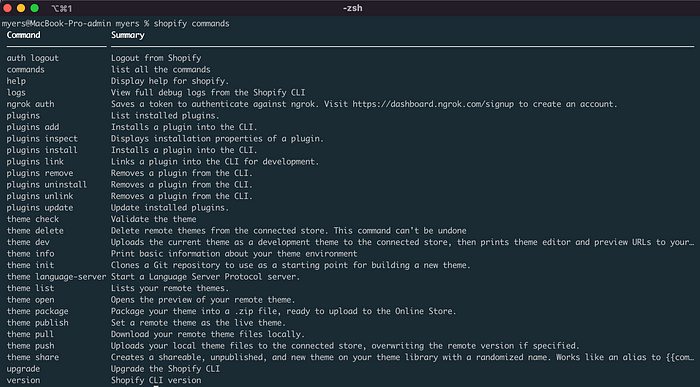
If you are using the latest Shopify CLI version, the command will be:
shopify help
Upgrade
Upgrades the @shopify/cli and @shopify/theme packages to their latest versions.
shopify upgrade
upgrade command won't perform any operation. In this case, you should update CLI dependencies using Homebrewbrew upgrade && brew update
Search
Starts a search on Shopify.dev.
# open the search modal on Shopify.dev
npm run shopify search
# search for a term on Shopify.dev
npm run shopify search <query>
# search for a phrase on Shopify.dev
npm run shopify search "<a search query separated by spaces>"
Full list
A documentation about the available CLI commands.
Shopify VS code extensions
You might have a question about Shopify extensions. When working with Shopify in Visual Studio Code, several extensions can streamline your development process. Here are some useful extensions to consider:
- Shopify Snippets: Offers snippets for Liquid, Shopify's templating language, to accelerate code writing.
- Shopify Theme Snippets: Provides snippets specific to Shopify theme development, aiding in quickly generating theme components.
- Shopify Liquid Template Language: Offers syntax highlighting, autocompletion, and snippets for Liquid, enhancing code readability and efficiency.
- ESLint or Prettier: Helps maintain code quality and formatting standards, ensuring clean and consistent code.
- GitLens: Facilitates Git version control within VS Code, beneficial for managing changes in your Shopify theme files.
These extensions are not sponsored, so I'm not attaching any links.
Overall
I want to say that Shopify is a great platform to learn e-commerce development and sell products online. I have enough experience in Shopify to say that I love it.